

Rut Keeps Coming Back? The Fix Is in the Order
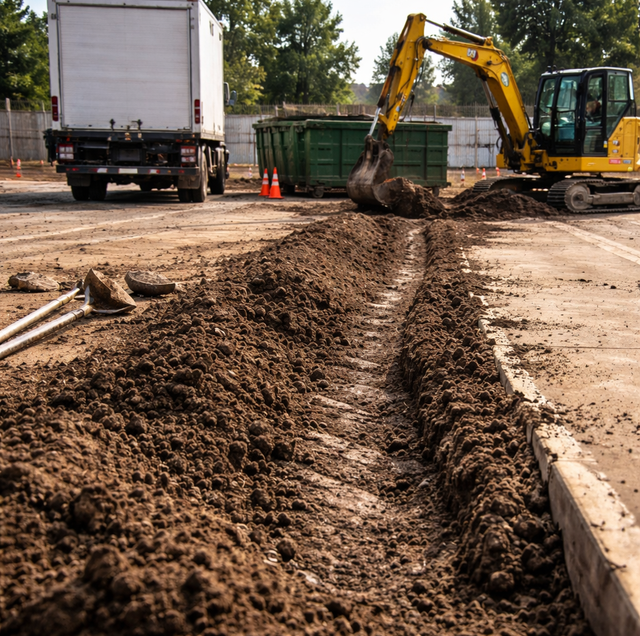
Quick Answer: A rut from any heavy load has two problems stacked together: a visible dip and compacted soil underneath. Shoveling loose soil into the dip fixes only the first. The lasting fix breaks up the compacted base, then deliberately refills and compacts it.
A box truck backs across the yard to make a delivery, a dumpster sits on steel skids for a week during a remodel, a small excavator tracks in and out to clear a fence line. None of it looks like a lasting problem while it's happening. Then the truck leaves, the dumpster gets picked up, the job wraps, and there it is: a shallow trench pressed into the lawn, sometimes barely an inch deep, sometimes deep enough to twist an ankle in low light. The common next move is to grab a few bags of topsoil, dump them in the low spot, rake it level, and call it done. It looks finished for a few weeks. Then a hard rain or two later, the same low spot is back in the same place, and it's tempting to blame bad soil or bad luck. Neither one is the actual cause.
What a Rut Actually Is Below the Surface
The groove you can see is only the top of the problem. Whatever crossed the yard- wheels, tracks, or a static load sitting in one place- pressed the soil beneath it together, squeezing out the small air gaps that loose soil normally has between particles. That's compaction, and it doesn't stop right at the visible edge of the dip. The pressed-together zone usually extends a couple of inches below the bottom of the rut and often a few inches wider than the groove itself, tapering off gradually rather than stopping in a clean line.
Compacted soil behaves differently from the soil around it in ways that matter for a repair. It drains slower, because water has fewer paths through it. It holds less air, so roots that try to grow into it struggle to get oxygen. And it's denser, which means it doesn't compress much further under new weight; it just sits there as a hard shelf under whatever gets piled on top of it.
Why Dumping Loose Fill on Top Doesn't Hold
This is the part that trips up an easy-looking fix: loose soil poured into a rut isn't landing on ground that matches it. It's landing on that hard, compacted shelf, and the two layers don't behave as one connected mass of dirt. The loose fill on top has plenty of air space and settles under its own weight the first time it gets wet, just like any freshly placed soil. The compacted layer underneath barely moves at all, because it's already about as dense as it's going to get without deliberate work.
That mismatch is what brings the low spot back. Rain soaks into the loose fill, the particles shift and pack down into the gaps between them, and the surface drops a little. It keeps dropping a little more with the next rain and the mower pass after that, while the compacted base underneath stays exactly where it was. Eventually the fill has settled down close to the level of the compacted layer it never actually merged with, and the dip is visible again in the same spot it started.
A footprint pressed into wet sand at low tide: sprinkle a handful of loose, dry sand over that footprint and it looks filled in for a moment. Walk near it again, or let a wave wash a thin layer of water over it, and the packed outline of the footprint shows right back through, because the dry sand on top never actually became part of the packed sand underneath it. A rut with loose fill dumped on top behaves the same way once weather and traffic work on it.
Step One: Break Up the Compacted Base Before Anything Goes Back In
The soil at the bottom of the rut has to be loosened before anything goes on top of it. On a small rut, a garden fork or mattock pushed straight down and rocked back works the compacted layer open a few inches at a time. In a wider or deeper rut, a walk-behind tiller or tine-cultivator attachment covers the same ground faster. Either way, the goal is the same: break the packed structure apart until the loosened soil has air gaps in it again, not just scrape the surface.
Work past the edges of the visible groove, not just the bottom. The compacted zone usually reaches a little wider and deeper than the dip you can see, and stopping at the visible edge leaves a hard collar around the repair that the new fill still has to fight against. Push the fork or tiller in until it meets loose, undisturbed soil rather than the packed layer, then keep going another couple of inches for margin.
Call 811 before working the compacted base more than a few inches deep, especially where the rut runs near a driveway apron or fence line. A tiller or tine cultivator can hit a shallow line just as easily as a shovel.
Step Two: Refill With Soil That Matches What's Already There
Once the base is loosened, the fill going back in needs to be close to the same type of soil as the surrounding soil, not whatever happens to be on hand. Mixing a heavy clay fill into a mostly sandy yard, or the reverse, creates a seam where the two soil types meet that drains differently than either one on its own, which is exactly the kind of boundary that holds water and softens underfoot after rain. If the soil that came out of the rut is reasonably intact and not pure hardpan, it can go back in as part of the fill once it's broken up fine; topsoil brought in to round it out should match the texture of the surrounding lawn as closely as reasonably possible.
Fill the repair in layers rather than with a single thick pour on anything deeper than three or four inches. A few inches at a time, worked before the next layer goes on, ties the new soil to the loosened base and to itself far better than one deep dump does.
Step Three: Compact the Fill In, Don't Leave That Job for Later Traffic
This is the step that gets skipped most often, because a freshly raked rut already looks like a finished job. It isn't, not until the new fill has actually been pressed down on purpose. Left alone, loose fill compacts eventually anyway, just slowly, unevenly, and under whatever happens to cross it next: foot traffic, a mower, the next hard rain. That uncontrolled settling is what produces the second sinking, the one that shows up weeks after the "fix."
A hand tamper does this on a small repair: a flat plate on the end of a pole, worked over each layer of fill before the next one goes down, presses air out in a way that a boot heel or the back of a rake can't match. On a rut wide enough to run a plate compactor over, a few passes per layer does the same job faster. Either tool works by impact: the plate strikes the soil with force well beyond a person's static body weight, and repeated direct hits cover every inch of the layer evenly. A boot or the back of a rake only delivers a brief static load wherever a foot happens to land, leaving unconsolidated gaps between footfalls no matter how many times someone crosses it.
Grade the final layer slightly proud of the surrounding lawn rather than flat. A properly compacted repair still settles a little as it beds in, and that margin keeps it from ending up low again once it's fully set.
Once that final layer is tamped and graded, grass seed or sod goes down on properly compacted, level ground rather than on a soft patch that would cause it to sink out of alignment with the surrounding lawn.
If the rut runs downhill along the yard's natural slope rather than across it, treat the repair a little differently than a rut running level or across the grade. A downhill rut can act as a channel that funnels water straight down its length even after it's filled, so the center of the repair should sit a hair higher than the flanks rather than perfectly flat, enough to shed water off to both sides instead of letting it re-carve the same line during the next heavy rain.
Why Skipping One Step Brings the Same Low Spot Back
Each step covers a failure the other two can't. Skip the breakup and new fill sits on a mismatched, unforgiving base no matter how well it's compacted. Skip matching the soil type; the repair holds its shape but drains differently from the surrounding ground, showing up as a soft patch even without a visible dip. Skip the compaction and the fill looks right on day one but settles gradually, under whatever traffic finds it next, back into the same shape it started in. A repair that lasts needs all three, in that order.
Frequently Asked Questions
Age matters as much as depth. A rut from a single wet-weather pass, still fresh with the grass merely bent rather than killed, often bounces back with nothing more than a core aeration pass through the compacted line, since the ground hasn't been under load long enough to fully lock into its new shape. A rut that's been there for weeks or months, with the grass dead in the track and water standing for more than a few hours after rain, has passed that point, typically once it's an inch or more deep, and the full breakup-refill-compact sequence is what actually reaches it.
Often yes, as long as it isn't pure clay hardpan scraped from well below the topsoil layer. Breaking the removed soil up finely with a fork or tiller and mixing it with a portion of fresh topsoil to reintroduce organic matter usually works better than either using it straight or discarding it entirely, since the original soil already matches the surrounding ground's texture and mineral makeup.
Impact, not contact area. A hand tamper drives force into the soil well beyond a person's static body weight with every strike, and a flat plate covers the whole layer evenly pass after pass. A boot only delivers scattered, momentary pressure wherever a foot lands, leaving gaps between footfalls no matter how many times someone crosses it. A hand tamper's impact also only reaches so far into loose material, typically about four to six inches per pass, which is part of why layering the fill matters as much as compacting it.
Yes, and the crowning has to extend past the visible ends of the repair, not stop abruptly at the rut's original edges. Tapering the extra height out over the last foot or so on each end keeps the crown from creating its own small dam where the repair meets undisturbed lawn, which would just move the channeling problem to a new spot. A rut running across a slope also needs its uphill shoulder tied in flush with the surrounding grade, since a lip left on that side backs water up against the repair instead of letting it pass over.
Give it through at least one real rain or a deliberate soaking, then check it a day or two later. Press a heel into the repaired area and compare the give to the established lawn nearby; soil that still sinks noticeably more than the surrounding ground hasn't finished settling and needs another few days before regular mowing or walking resumes over it.
A rut under about two feet wide and a few inches deep is usually manageable with a fork, tiller, and hand tamper in an afternoon. Once a rut runs the length of a driveway approach, spans several feet wide, or sits deeper than four or five inches, breaking up that much compacted subsoil by hand becomes a multi-day project, and a mini skid steer with a rake attachment or a plate compactor covers the same ground in a fraction of the time with more even results.
A rut is never just a cosmetic dip in the lawn. It's a record of what the ground underneath went through, and filling over that record without addressing it just buys a few weeks before the same low spot writes itself back in.
Get a heavy-equipment rut broken up, refilled, and properly compacted in one visit — so the repair holds instead of sinking back in. Polk Services LLC serves Lakeland, Highland City, and Mulberry. Call (863) 344-5806.
