

How to Repair Small Ruts in a Gravel Driveway by Hand
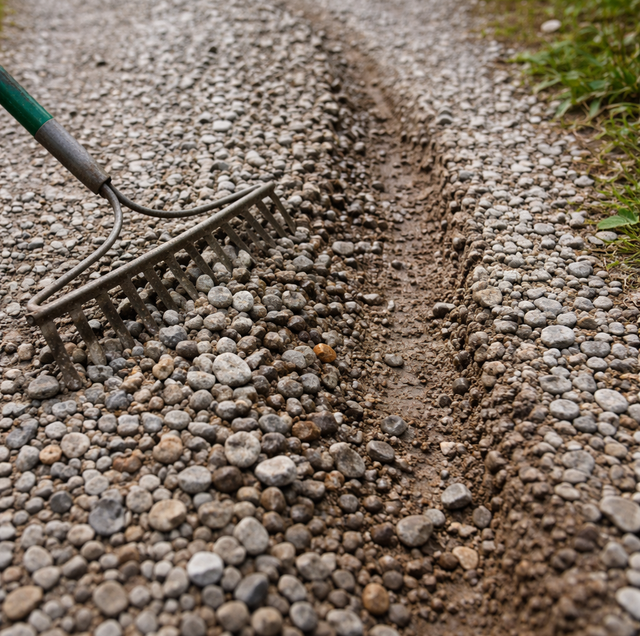
A rut that shows up in the tire path of a gravel driveway doesn't automatically call for a machine or a phone call. When the groove is shallow, sits in one wheel path, and hasn't spread into a soft spot underneath, a rake, a hand tamper, and an hour of work is often enough to put the stone back where it belongs. The part homeowners usually get wrong is the order of operations: raking loose stone into a hole and driving over it isn't the same repair as raking, topping off, and compacting, and the difference shows up within a week or two.
What Makes a Rut Small Enough to Fix Yourself
A rut is a reasonable DIY candidate when it's a single, shallow groove under about an inch deep, confined to one wheel path, the stone around it is still loose and workable rather than packed hard into mud, and the spot has only needed attention once or twice before, not repeatedly. If you can still see and feel individual stones when you scoop a handful from the bottom of the groove, the material is displaced, not gone, and that's the situation hand tools are suited for.
A rut is past that point when it's widened beyond the tire path into a broader depression, when it holds water well after the rest of the driveway has dried, or when it's the same spot you already patched once or twice this season, and it's back. Those patterns point toward something happening below the surface stone rather than a surface groove you can rake flat, and that's a different kind of problem than what this guide covers.
The Hand-Tool Process: Rake, Fill, Tamp
Rake first: Work the rake along both edges of the groove before touching the low center. A rut's displaced stone typically piles up in ridges just outside the wheel path rather than disappearing, so the first job is breaking those ridges apart and pulling that material back over the low spot instead of leaving it stranded at the edges.
Fill to grade in one pass: At under an inch deep, this rut is shallow enough that the recovered and topping stone goes in as a single fill rather than in stacked layers, since a hand tamper's strikes reach through the whole depth at once. If raking and topping ever leaves a spot that needs more than an inch of fill to come back level, that's beyond the scope of this guide, and it's worth treating as the deeper, structural case instead.
Tamp the full width: Set the tamper flat and strike straight down, working the full width of the groove in overlapping passes rather than a few hits in the center. The fill is compacted enough when the tamper stops sinking noticeably between strikes and the surface feels firm underfoot rather than springy.
Mist the stone with a hose before tamping, rather than working it bone-dry. A light dampening helps fine particles bind to the larger stone and lock together under the tamper's strikes, similar to how damp sand packs tighter than dry sand. Soaking wet is too much; aim for damp, not muddy.
Top off only if material actually left the area: There's a real difference between stone that shifted (still sitting nearby, ready to be raked back in) and stone that migrated out of the area entirely, kicked into the grass, washed toward the shoulder, or ground down to dust from repeated tire contact. If raking recovers most of the volume, you're redistributing what's there. If the groove is visibly shy on material after raking, that gap needs to be topped off with stone matching the driveway's existing size and shape before you tamp it down, not loose fill from whatever bag happens to be in the shed.
Why a Hand Tamper Doesn't Hold Like Machine Compaction
A hand tamper compacts through repeated strikes from a person's arm and body weight, which delivers a fraction of the force and, more importantly, a fraction of the consistent vibration that a plate compactor or roller applies across the same area. That's a physical limit of the tool, not a sign the repair was done wrong. The practical result is that a hand-tamped patch reaches a lower density than the same spot would if a machine had compacted it, which means it has less reserve capacity before the next round of tire loading starts working it loose again.
In practice, that means treating a hand-tool rut repair as a maintenance task you'll likely repeat every few weeks to a couple of months in a heavily used wheel path, not a one-time fix. That's a fair trade for the time and effort of not calling in equipment for a groove that's only an inch or so deep, but it's worth going in with that expectation rather than being surprised when the same small dip reappears faster than a machine-graded section would.
The Mistake That Undoes a DIY Fix Fast
The single most common way a DIY rut repair fails isn't a wrong tool choice; it's skipping the tamper altogether. Dumping a bucket or bag of loose stone into a groove and letting vehicle tires press it down over the next few trips may feel like less work, but tires don't compact it evenly the way a flat tamper foot does. A tire's contact patch shifts and rolls as it moves, which pushes loose stone sideways out of the groove rather than packing it down into place. Left to "self-compact" under normal driving, a loose-filled rut often re-opens within a week or two, sometimes faster than the original groove took to form, because the fresh stone has no base to lock into and simply gets displaced the same way the original material was.
When to Stop and Get an Assessment
If the same spot needs a hand-tool repair a third time within a short stretch, or the rut reopens in roughly the same footprint after two or three attempts even though you're raking, filling, and tamping each time correctly, that recurrence is telling you something the surface material can't fix on its own. A groove that keeps coming back despite proper compaction usually points to a subgrade issue rather than a stone problem, and that's worth checking with a proper diagnostic read rather than a fourth round of raking. This guide is scoped to working the surface stone itself; if a rut ever calls for digging down into or past the base course, that's excavation, and it needs a utility locate first, not just a rake.
Frequently Asked Questions
There's no fixed interval, but the range in a heavily used wheel path, several weeks to a couple of months, still compares to a machine-graded section of driveway that can go a full year between regrades. Traffic volume is the biggest factor, but rainfall matters too: a spot that dries out and firms up between rain events holds noticeably longer than the same repair in a low, slow-draining area that stays damp, since damp material underfoot loosens faster under repeated tire contact than dry, well-compacted stone does.
A manual tamper with a flat head in the 8- to 10-inch range and a total weight of around 10 to 20 pounds is the practical size for a single wheel-path rut. Anything smaller struggles to compact a wide enough footprint per strike, and anything much heavier becomes difficult to lift repeatedly for the number of strikes a full-width fill requires.
Slightly damp compacts better than bone dry. A light misting from a hose before tamping helps fine particles bind to the larger stone and lock together under the tamper's strikes, similar to how damp sand packs tighter than dry sand. Soaking wet is a different problem: oversaturated material squishes and displaces under the tamper rather than compacting, so aim for damp, not muddy.
Only if it matches the driveway's existing stone in size and shape. Mixing in a bag of smaller, rounder gravel from a flower bed or another project creates a loose pocket that won't lock into the surrounding angular stone the way matching material does, and that mismatched patch often re-ruts faster than the rest of the driveway.
For a groove roughly a foot wide, an inch or so deep, and three to four feet long, plan on somewhere around one standard 50-pound bag of matching stone to bring the area back level after raking recovers what it can. A groove any deeper or wider than that is past the point a hand-tool fix reliably holds, and the physical labor of hand-shoveling and tamping multiple bags stops being a practical DIY session at that scale anyway.
Yes. Rake across the groove, pulling material from both sides toward the center, rather than dragging it lengthwise along the direction of travel. Raking along the wheel path tends to just relocate the ridge material a few inches without redistributing it into the low spot, while working perpendicular to the groove pulls stone from both edges inward where it's needed.
Get a driveway rut assessment — we'll check whether a recurring low spot is a simple surface fix or a sign the base needs attention. Polk Services LLC serves Lakeland, Highland City, and Mulberry. Call (863) 344-5806.
